
Interview Lighting: Quick, Easy and Good Looking?
It was early last week I had a phone call from a director friend of mine Nathan Cook asking whether I would be willing to help out with filming some interviews for the University of Leeds RAG event ‘Take Me Out’ raising money for charity, my answer was yeh, of cause!
Now if you aren’t familiar with the format of ‘Take Me Out’ it is a bit like a cross between ‘Blind Date’ without the blind and ‘Britain’s Got Talent’ without the talent.
Ok, so you get the idea, basically I need to shoot the video element of the show, filming the single men and the friends/family. Simple enough… well there is a catch… we need to setup and shoot 22 people in two, one hour slots… this is further complicated as the director is keen to shoot on DSLR! Just on the brink of pulling out my hair I looked at the shoot logically and though about what approach I would take to light 22 different people, with different skin tones, different shaped faces and different heights, all trying to make them look at their best. Well it is a dating game after all!
Thinking the rule KISS was applicable in this situation I then remembered a blog post I had read by Art Adams a little while ago titled ‘the simplest, fastest interview lighting setup—ever’. Now, I have been reading Art’s blog for some time now and find his approach to lighting fascinating and his results really amazing, Art ends his blog post ‘being fast is as important as making pretty images. This technique allows for both. Give it a try and see what you think.’ so I did!
The basic lighting setup using one light and two pieces of polyboard.

As you will read in Art’s post, the technique requires two 4’x4’ polyboard sheets, a 650w fresnel and relevant stands and a few pieces copy paper, simple! As this was a no budget shoot I had to pull it off with my own kit and that begged and borrowed too! So with my fantastic assistant Ollie Craig lined up to help out I knew we could pull it off!
So How Did We Pull It Off?
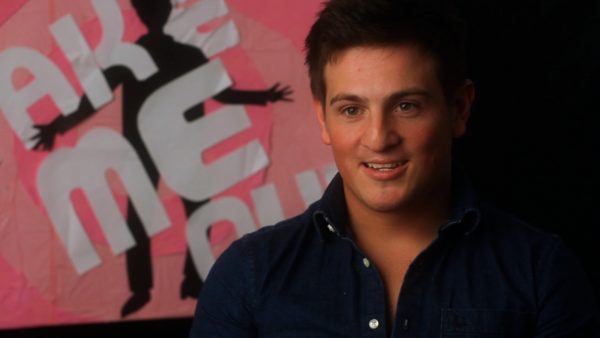
One of the contestants doing his bit in front of the camera.
We turn up to location not a minute before 4pm to setup, we really had to keep the setup time to a minimum as we had some many people to shoot. For lighting we setup as per Art’s suggestion but having to use ‘reflector holders’ to hold the polyboard in place as I don’t have any polyboard forks.
The technique of using the ‘reflector holders’ to hold the polyboard actually works much better than it sounds. It requires that the two parallel edges of the polyboard are pushed against the reflector holder hooks, and the arm tighten up to hold it in place. Once mounted on a large lighting stand the boards and be rotated in all directions.
Our interview setup.

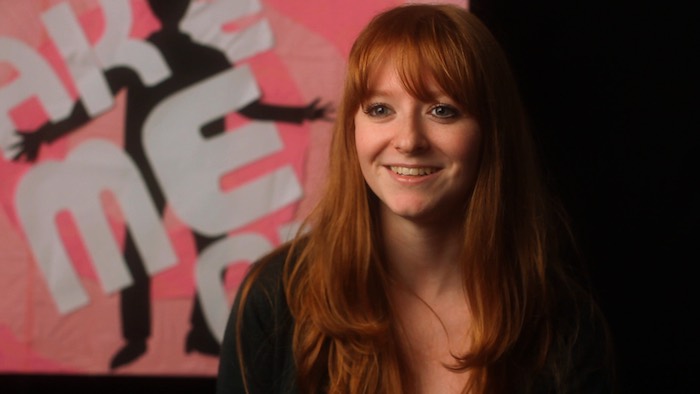
As the room we were shooting in was small, the background was pretty close to the subject. We decided to replace the plain white wall with a black sheet and insert a ‘Take Me Out’ poster made by the RAG staff to make it a bit more interesting. With the background being quite close to the subject this not only makes it difficult to separate the background from the subject but it also makes flagging light from the background pretty difficult too, particularly when it needs to make the black sheet dark and consistent enough in terms of brightness but also needs to illuminate the ‘Take Me Out’ poster. In the end we flagged the background with a black reflector placed between the white polyboard and the background, slightly tilted to give the greatest effect on the background. We also mounted the ‘Take Me Out’ poster on a spare stand I had so we could move the poster up/down and left/right depending on the height of the person. This worked really well as it just took two ticks to get the poster in the perfect position for the person.
I had my newly purchased LG ISP225 21.5” monitor on set. This is a newly launched budget IPS LED monitor which is calibrated at the factory. It offers greater off axis viewing than PN panels and more accurate colour reproduction too. At full 1080p resolution with HDMI in, and a street price of £130, I think it is a bargain! This was the first outing for the monitor but it made shooting on the DSLR much easier for showing the director/producer the shot and for getting a better idea of lighting. It came in particularly useful when moving the ‘Take Me Out’ poster for each person as it avoided the usual left a bit, right a bit routine with the person moving the poster and the camera op!
The room was so small there was only just enough space to sit behind the lens!

In terms of our camera setup, we used my trusty Canon DSLR with a Canon 50mm f1.4 lens donated by Ollie, setup with follow focus and matte box. When prepping for this project I was very keen to get the look in camera as there was very little time in post for the project. Because of this I decided not to shoot on my usual Technicolor ‘Cinestyle’ setup but instead on the ‘Standard’ profile the Canon offers to give the picture more contrast and saturation to avoid the need for any post-production colour grading. In addition, I was keen to give it that typical dating show interview look, softening the picture slightly, giving it that dreamy look. I opted to use my supermist black ½ formatt 4”x4” filter to achieve this, and I think it worked pretty well. I also wanted to get the background slightly defocused so not to make it distracting. Now with the background close to the subject the DSLR came into its own with its shallow depth of field. I think in the end I shot at about f2.5 at ISO200 giving me just enough room for the background to go out of focus but to also give the subject a little room to move, although if they moved too much it was game over in terms of focus! In the picure above you can see how small the room was with the camera practically shoved against the back wall!

The fill side polyboard with two sheets of A3 paper attached to add positive fill.
At 4:30 the first interviewee sat down and we started to roll. The only thing I found with the lighting setup was that the key didn’t wrap around the face quite enough for my liking even with positive fill on the fill side polyboard. To correct this I had to angle the key polyboard slightly more towards the interviewee than Art demonstrates in his article. I found this solved the fill side brightness problem and gave a nicer wrap around in my option, although in hindsight this could have been caused by the interviewee not sitting off axis enough from the camera. I also placed the light and polyboard slightly higher than Art suggests in his article to get the nose shadow to fall down the smile line, now with this setup the shadows are so soft it is barely noticeable but I think it was worth it.
The white polyboard angled for the light to wrap around the face more.

Overall I found the lighting setup offered a lovely soft source which, in comparison to other standard setups, made everybody who was interviewed look really good with minimal readjustment. It gave each interviewee a great eye light and a lovely gradient from the light to dark side of their face. The setup is pretty compact when compared to similar size softbox sources, and I think it is quicker to setup when you factor in the readjustment time which would be required when using one.

With this setup we managed to blast through all the interviews in two hours, even having to tailor the setup slightly to get two people in shot a few times. This actually works well as the source is so big enough that nobody blocks the other persons light.
There is something liberating about lighting interviews with no budget and minimal kit and making them look great. And I feel this setup offers exactly what Art says at the end of his post ‘being fast is as important as making pretty images. This technique allows for both’. I couldn’t agree more!
Thanks again to Ollie for providing some of his equipment for the shoot; along with his time and the BTS photos he took. And of course I wish Leeds RAG all the best with their event!
Found this blog useful? Why not ‘Buy me a Coffee’ and help keep my blog running! Follow the donate button below.
![]()