
A Cinematographer’s Guide to Shooting Vertical Video: Part 2
Recap
Welcome to the second post in my series of blogs about Vertical Video. If you haven’t read the first part I’d urge you to take a look here. It covers the basics; why vertical video, the different vertical aspect ratios used and how to use frame guides to help you shoot vertical video.
In this blog I am going to look at the how to rig your 16:9 camera to shoot vertical video.
Rigging Your Camera
As I discussed in the first part of this blog, if you are using a 16:9 camera and wanting to achieve a 9:16 aspect ratio you are best using the camera in the vertical plane.
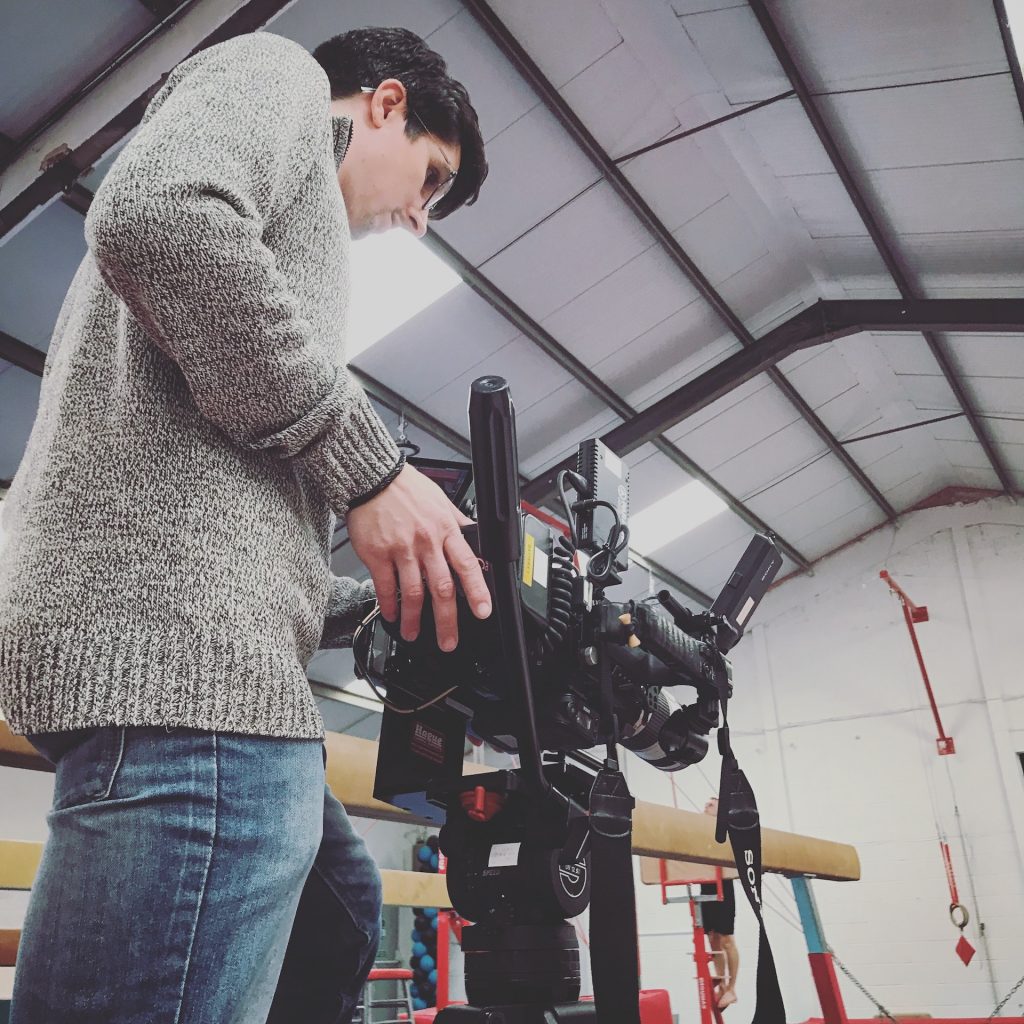
To achieve this, it generally requires rigging your camera on its side. If you are shooting on a small mirrorless camera, like the Sony A7sII, with a full body cage, you should be able to just attach your tripod plate to the side of the camera, rather than the bottom, to achieve the 90 degree rotation. For camcorders like the Sony F5, FS7 or FS5, or even smaller camcorders like the NX80 or Z90, you are going to require a 90 degree bracket to get the camera ‘on its side’.

90 Degree Bracket
So, before going out buying the latest 90 degree bracket, here are my three thoughts to help you pick the right one for you.
Firstly, consider the weight of your camera. It goes without saying, the heavier your camera, the bigger and more sturdy a bracket you are going to need. Equally, there is not point using an oversized bracket on a smaller camera either.
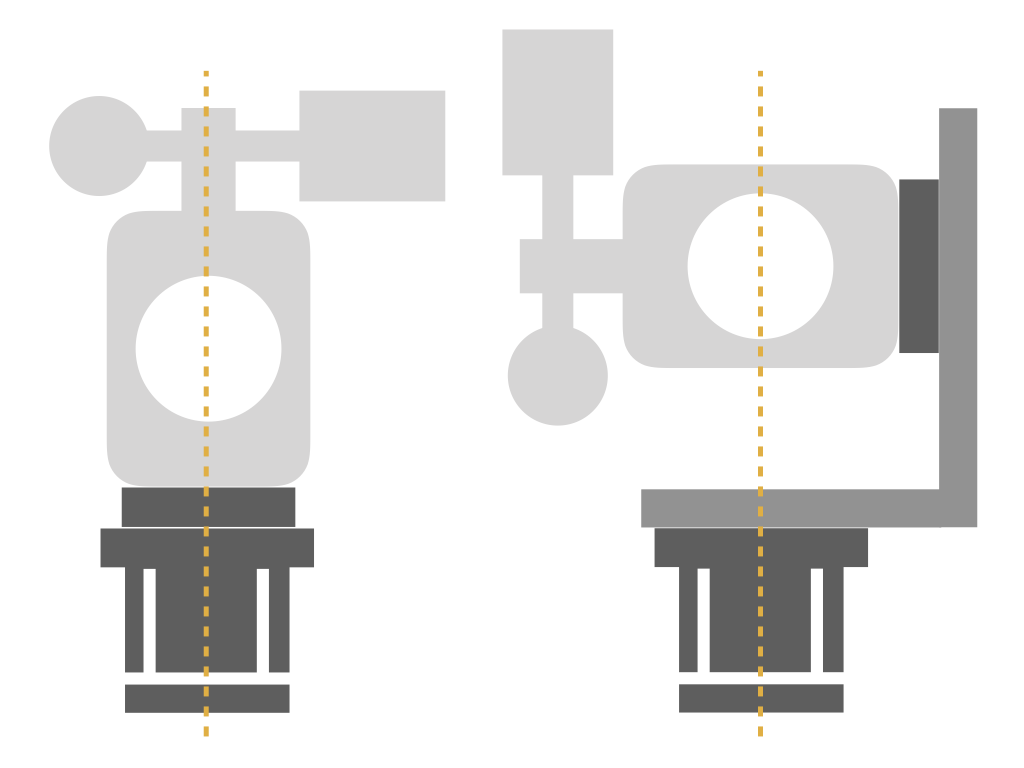
Secondly, consider your tripod! When you rig your camera on a 90 degree bracket you are raising the centre of gravity of the camera rig, therefore putting more effective pressure/weight on your tripod. This may require you to use a larger tripod head or to increase the counterbalance setting compared to normal.

A 90 Degree bracket with plenty of flexibility in screw holes etc. may allow you to mount the camera as low down to the tripod head as possible, therefore lowering the centre of gravity, but take into consideration accessing ports/cables from the off side of the camera when mounting.
Thirdly, ensure your lens is as central to the tripod’s centre of rotation as possible. This ensures your pans don’t look like boom swings! Again, having a 90 degree adaptor that has plenty of screw holes helps line up the lens as close as possible!
There are several ‘off the shelf’ 90 degree bracket options for you to choose from depending on the weight/size of your camera rig.
My 9:16 Rigs
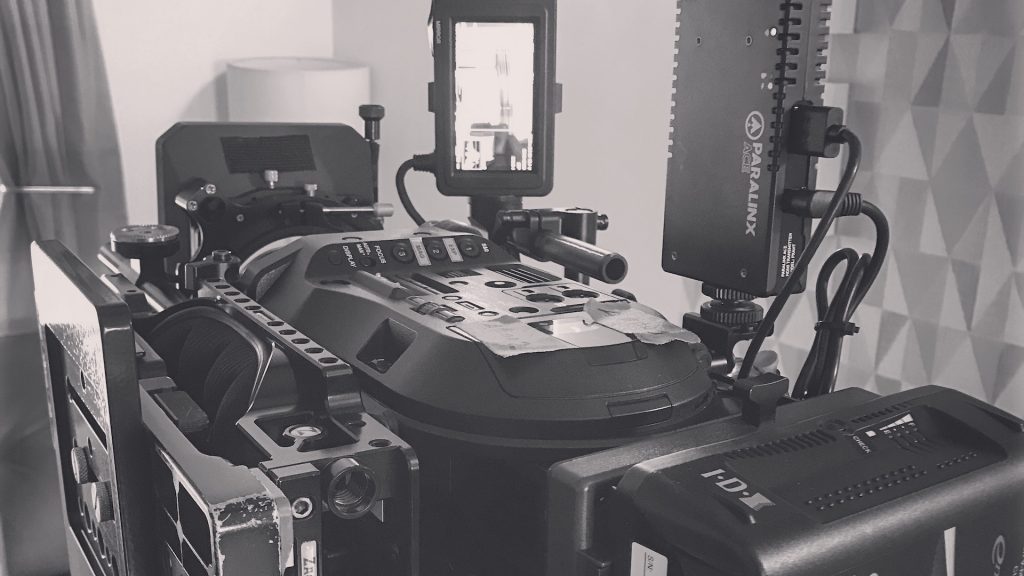
For my Sony FS7 I have been using the Hague Heavy Duty 90 Degree Adaptor. It has plenty of screw holes to mount your camera and tripod plate to, just where you want to, and it is suitable for cameras up to 20Kg.
For my smaller Sony NX80 I have been using a smaller 90 degree adaptor I purchase off of Amazon, similar to the one linked below. As an Amazon Associate I earn from qualifying purchases.
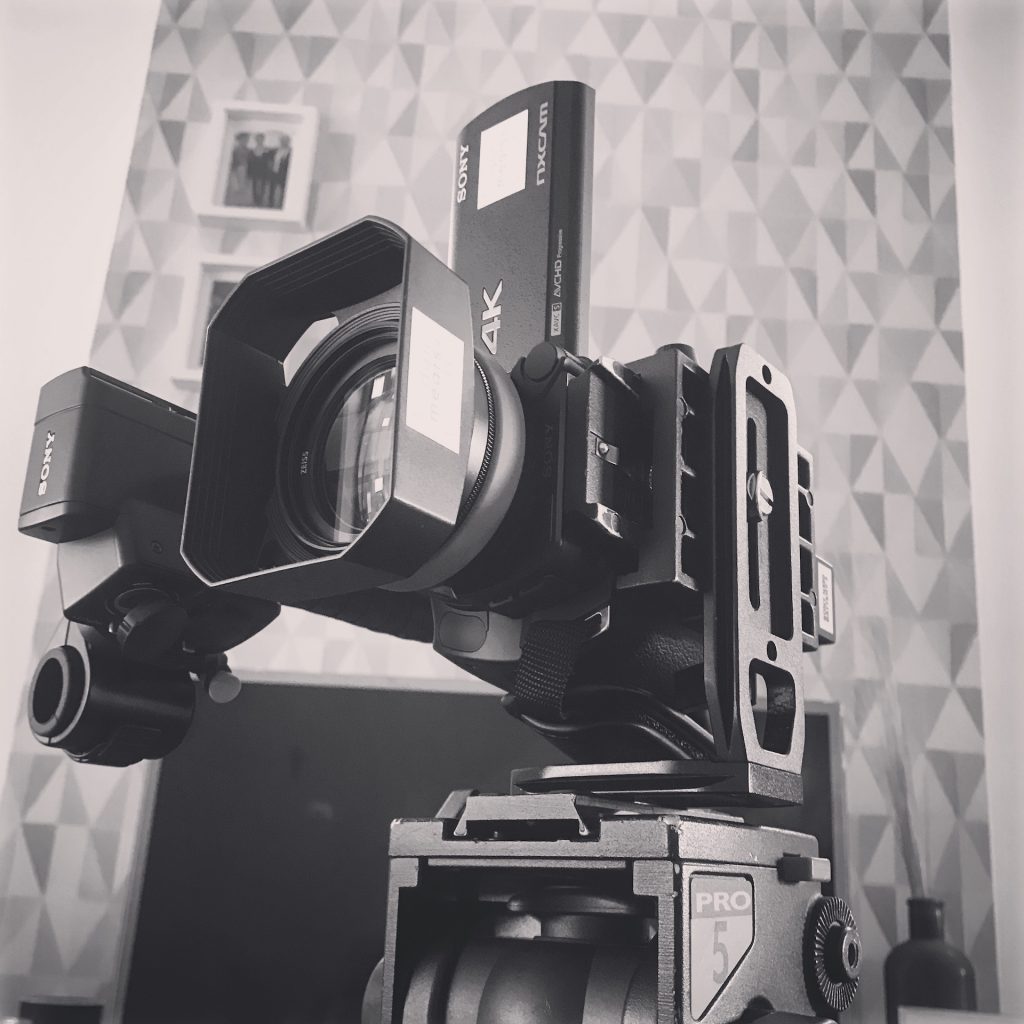
As you can see, the adaptor is a lot smaller but much more suitable for a palm camcorder.
Other Considerations
Firstly, when mounting the camera on its side, consider which side you want to mount it on. I’ve taken to mounting my cameras so the ‘operator’s side’ faces upward for easy access to buttons, controls and viewfinders/screens.
Secondly, it’s quite tricky mounting your camera to a 90 degree plate as you don’t have gravity working with you! Therefore, I’ve been using various quick release plates to help rig my camera. On the Sony FS7 I’ve been using a VCT plate and on my smaller Sony NX80 I’ve been using a Manfrotto quick release plate. Oh, and use plenty of screws! Remember our cameras aren’t designed to be rigged in this way so try to make the rig as secure as possible is key!
Finally, once you have rigged your camera to the 90 degree plate you realise quite quickly that most of your on-camera accessories will need to find a new home. I had to re-position my wireless video transmitter and on-camera monitor to work with the camera rigged in this way. Allow yourself some time to consider how to re-rig your camera.
You may also need to move usually fixed components of your camera rig to make it easier to operate. For instance, I usually use 15mm rods to mount my matte box. With the camera rigged on the 90 degree plate I found that rods got in the way of me being able to use the lens’ focus and zoom rigs. Therefore, I removed the 15mm rods and just used the lens hood instead.
Summary
There we have it, some considerations to take into account when rigging your camera to shoot 9:16 vertical video.
In the next blog post I will take a look at framing conventions for vertical video and some clever editing tricks to make your 9:16 videos look amazing!
Found this blog useful? Why not ‘Buy me a Coffee’ and help keep my blog running! Follow the donate button below.